


Safety Blitzes: How They Create Pressure and What They Risk
Updated: 5 hours ago
A safety blitz sends a safety toward the quarterback or backfield as a rusher. The safety may attack from the edge, an interior gap or a disguised position at depth.
Part of Football 101. Explore the guide to choose your next topic.
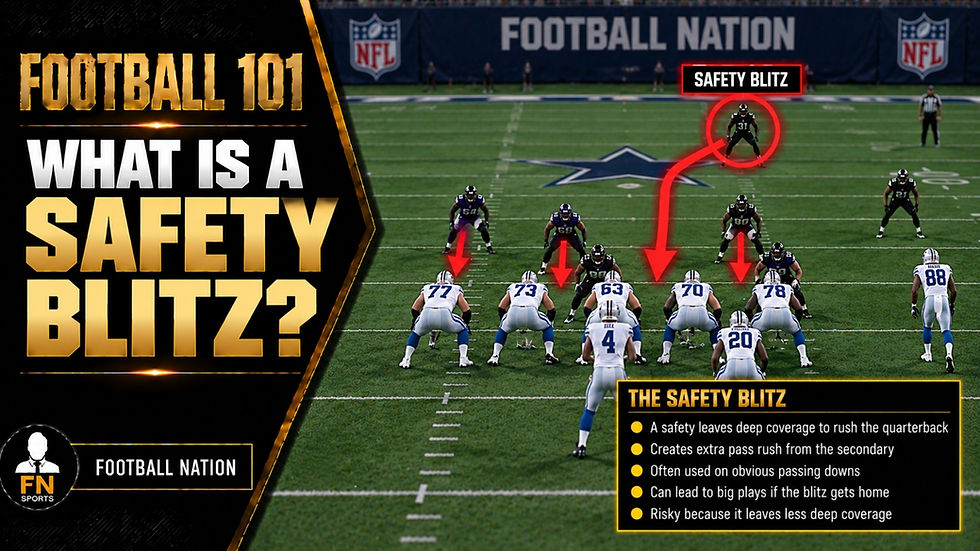
The term identifies who rushes. It does not establish how many defenders rush or which coverage remains behind them.
Pressure from an unexpected place
The offense often begins its protection count with the front and nearby linebackers. A safety entering late can force the line and running back to account for a threat that initially looked like a coverage player.
The defensive line may occupy blockers or move across gaps to create the safety's path. The safety must time his approach: showing too early lets the offense adjust, while arriving too late can leave him chasing a ball already thrown.
A safety can rush while another defender drops, so the total may still be four. A zone blitz describes a pressure and coverage exchange, whereas safety blitz identifies one participant. The terms can describe the same play from different angles.
Who replaces the safety?
Coverage must account for the responsibility he leaves. Another safety may rotate to the deep middle. A corner or linebacker may handle the vacated area. In a man pressure, assignments can be redistributed before the snap.
An aggressive Cover 0 call can leave no deep helper. That may create a fast rushing threat, but a receiver who wins his matchup has no safety waiting above him.
For example, a safety threatens outside the tight end while a linebacker bluffs an interior rush. If the linebacker drops and the safety comes, the offense must protect against the actual exchange rather than the number of defenders initially crowding the line.
How the offense responds
The quarterback can adjust protection, use a built in quick throw or attack the area the blitzer leaves. The back may need to scan from an interior threat toward the safety. Neither an untouched rusher nor a quick completion alone reveals which assignment failed.
When watching, follow the safety's first steps, count the actual rushers and find the replacement coverage. A safety standing near the line can also cover, support the run or bluff pressure. His movement after the snap confirms the blitz and exposes its tradeoff.
Examples and illustrations

Keep learning
Blitz pickup explains how the offense accounts for the extra threat.
Hot routes explains how a quick throw can answer pressure.
Green Dog blitzes explains pressure triggered by a receiver staying to block.
Explore the Football 101 collection.
Sources: NFL example of a safety sack.


Comments